
Electrode Positioning
NOTE: Optimal electrode positioning will lead to better results and improved ReGrasp experience.
TIP: Electrode positioning is mainly a trial-and-error process. Please be patient and experimental when finding the optimal electrical positioning.
The underside of the garment has electrode leads for attaching the electrodes. The garment's electrodes leads each have a fabric tab with Velcro, allowing the electrodes to be moved to different positions within the garment. There are four electrode leads on the underside of the garment:
- Hand-close electrode lead
- Hand-open electrode lead
- Thumb-close electrode lead
- Reference electrode lead (will always be the different colored tab)
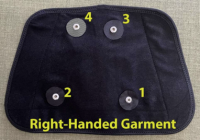
NOTE: The above image is for a right-handed garment. For a left-handed garment, tabs 3 and 4 would be flipped and tabs 2 and 1 would be flipped.
NOTE: The hand-open and hand-close tabs will always be on towards the wider end of the garment, while the thumb-close and reference tabs will always be towards the slimmer end.
1. Hand-Close Electrode:
When the garment is donned, the hand-close electrode rests against the underside of the forearm and, when activated, causes the fingers to close. Position the hand-close electrode within 5cm of its neutral position (where the lead exits the garment) on the garment. Start by centering the electrode in its neutral position and observing the resulting hand-close stimulation effect. If the effects are not optimal, check out our electrode placement troubleshooting article.

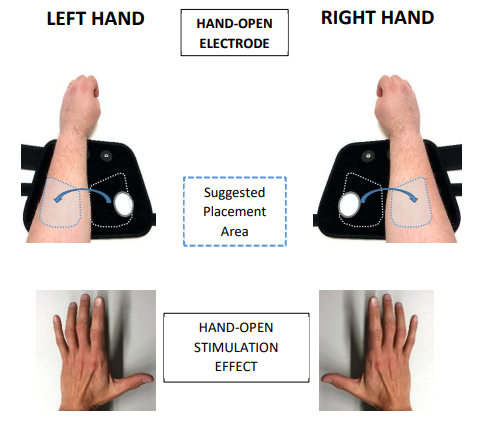
2. Hand-Open Electrode:
When the garment is donned, the hand-open electrode rests against the upper forearm and, when activated, will cause the fingers to extend. Position the hand-open electrode within 5cm of its neutral position (where the lead exits the garment) on the garment. Start by centering the electrode in its neutral position and observing the resulting hand-open stimulation effect. If the effects are not optimal, check out our electrode placement troubleshooting article.
3. Thumb-Close Electrode:
The position of the thumb-close electrode depends on the desired thumb movement
during hand-close stimulation. There are three options:
- No thumb stimulation
- Thumb pinch-grip
- Thumb fist-grip
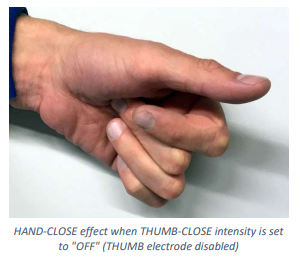
No Thumb Stimulation
When thumb movement is not required, the thumb close intensity should be set to “OFF” (see our adjusting intensities article). The thumb electrode can be positioned anywhere on the garment such that the electrode rests comfortably against the arm when the garment is
donned.
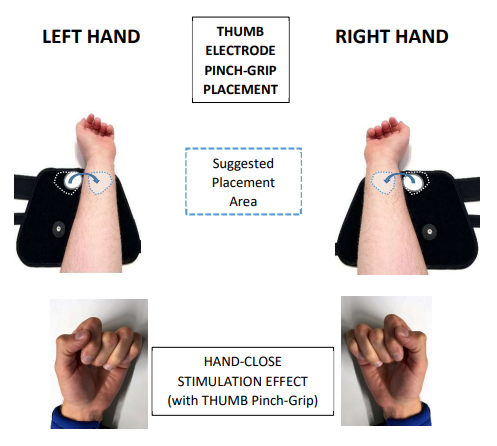
Thumb Pinch-Grip
The thumb can be stimulated to press against the index finger during 'hand-close' stimulation by positioning the thumb electrode in the suggested placement-area as seen in the image below. When the garment is donned in this configuration, the thumb electrode should rest against the underside of the wrist, just below the heel of the thumb:
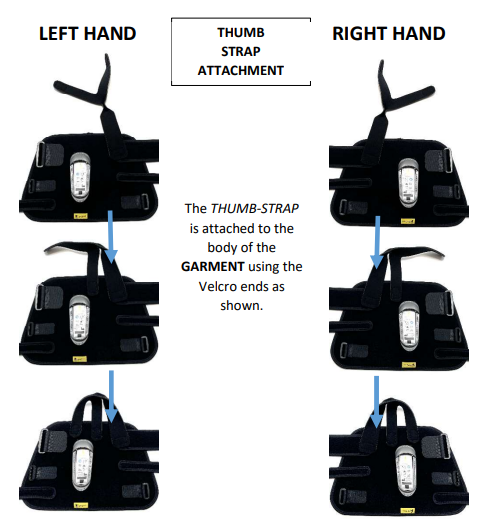
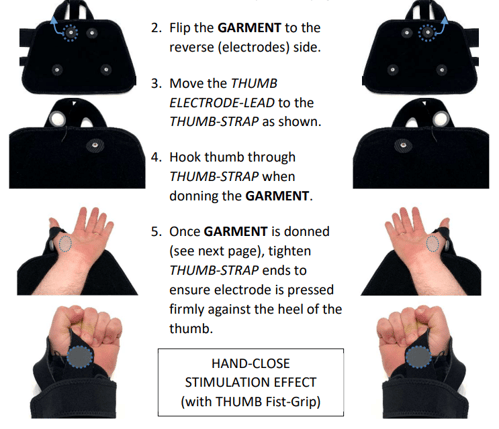
Thumb Fist-Grip
By placing the thumb electrode against the heel of the thumb, hand-close stimulation will cause the thumb to wrap across closed fingers. This placement is achieved using the garment's thumb-strap:
1. Attach the thumb-strap to the top of the garment:
4. Reference Electrode:
When the garment is donned, the reference electrode should sit comfortably on top of the wrist, similar to a wrist-watch. Although the reference electrode does not stimulate directly, it is required for the other electrodes work correctly. The reference electrode should remain in a neutral position on the garment (where the lead exits the garment) and should not require any subsequent position adjustment:
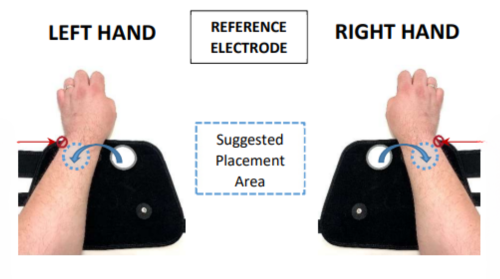
NOTE: Avoid placing electrode over the boney part of the wrist (as seen in the red arrow above). Doing so will cause discomfort).
TIP: The "wrist-watch" position of the reference electrode can be used as a reference to ensure the garment is positioned consistently on the arm each time it is donned.
For additional electrode positioning assistance, please refer to our YouTube instructional video: